A Minecraft shape generator is a browser tool that turns a chosen size into a block-by-block plan for circles, ovals, spheres, domes, stars, and pixel art. You enter a diameter, width, height, or layer count; the tool returns row runs and layer maps you can build in any world. It is for survival players, creative builders, and server owners who want clean symmetry without guessing. Start with the circle generator for round builds or the circle chart for quick row tables.
What a Minecraft Shape Generator Actually Does
The tool is a deterministic geometry calculator. It does not place blocks for you, and it does not need a mod to run. You choose a shape, set the dimensions, and the page rebuilds the same plan every time from the same inputs. A 15-block circle stays a 15-block circle; a 32-block sphere stays a 32-block sphere. That repeatability matters when you share a plan with another builder or return to a project after a break.
Different shapes solve different problems:
- Circle generator for round towers, wells, arenas, and circular floors.
- Circle chart for a compact row table you can read while building.
- Sphere generator for planets, orbs, balloons, and round roofs.
- Dome generator for roofs, observatories, greenhouses, and tunnels.
- Star generator for decorative stars, badges, and pixel symbols.
- Pixel art generator for flat wall art and floor mosaics.
If you are planning a base around these shapes, the Minecraft house designs page can help you match a round footprint to walls, roofs, and entrances.
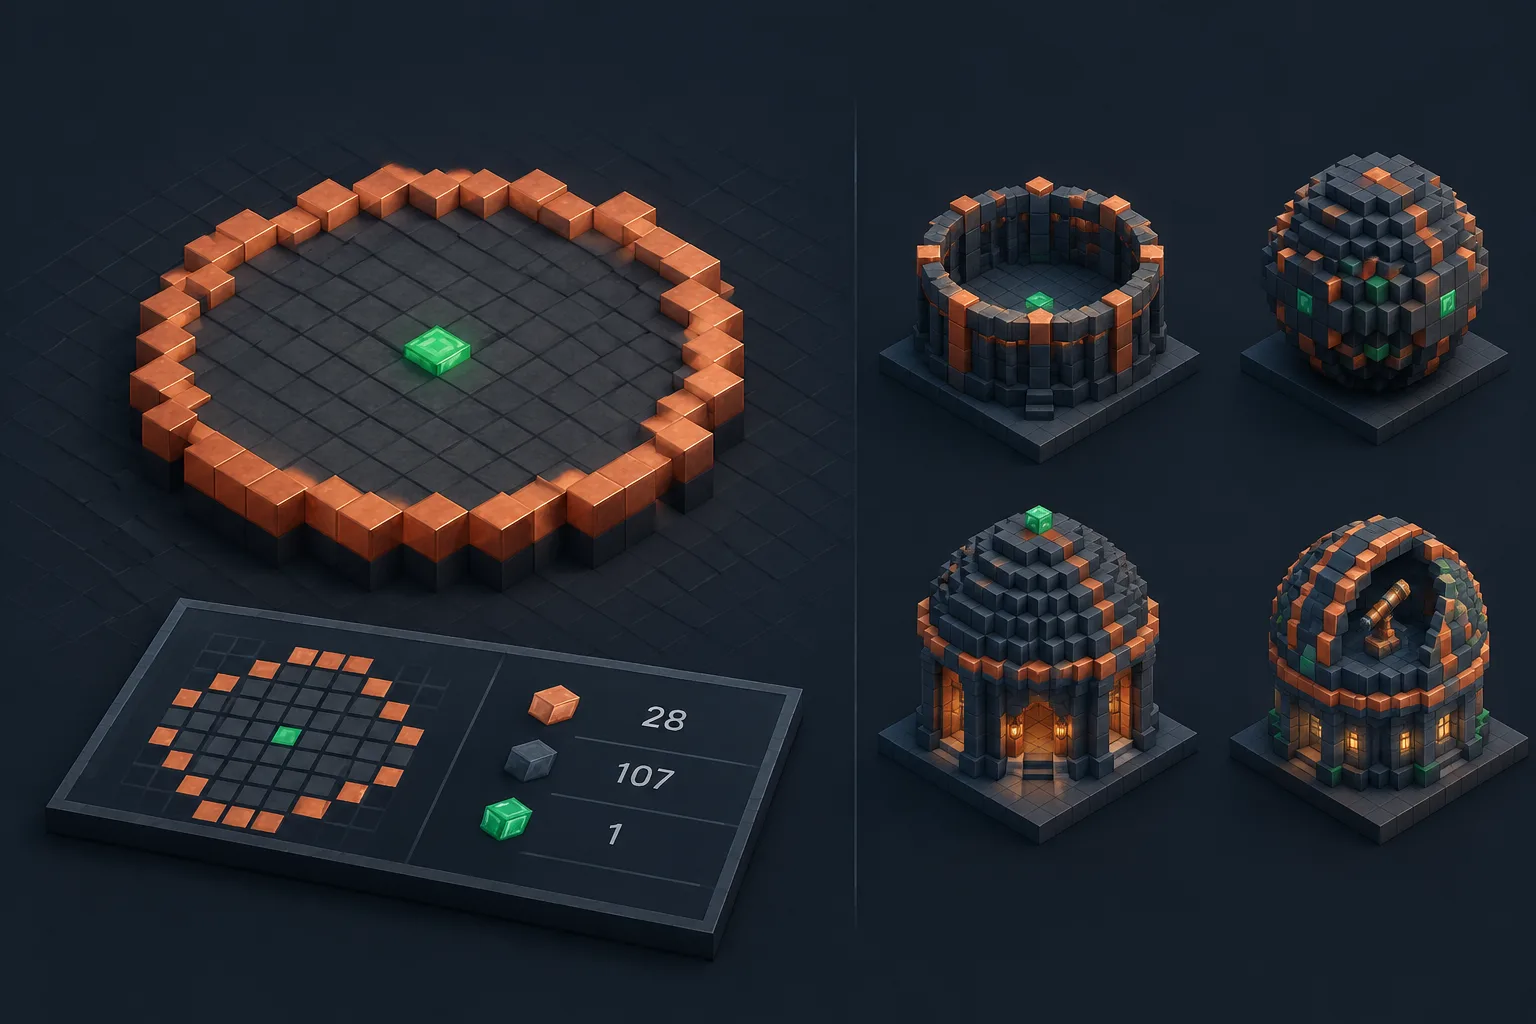
Understanding the Geometry: Odd Centers, Even Centers, and Rasterized Rows
Odd and even diameters
The first decision is whether the widest row has an odd or even number of blocks.
An odd diameter has a center block. If you build a 15-block-wide circle, column 8 is the center column. You can mirror left and right around that single block. This is the easiest center to mark and the most common choice for towers and domes.
An even diameter has no single center block. The center falls between two blocks or along a 2-block line. A 16-block-wide circle mirrors in pairs: one block on the left pairs with one block on the right, and there is no middle column. Even diameters are useful when your build sits on a grid with an even number of chunks or walls, but they can feel off-center if you mark only one block.
The generator handles both cases, but you must keep the same center when you build. Moving the center by one block changes every row.
Row runs and rasterized circles
Minecraft is built from cubes, so a true curve becomes a rasterized edge. The generator approximates the circle on a square grid. A row run is the horizontal sequence of blocks on one row. For example, a row might read start 4, end 11 or simply 8 blocks.
Rows are almost always symmetrical. If the top row has 5 blocks, the bottom row has 5 blocks. If row 3 has 11 blocks, the matching row near the bottom has 11 blocks. You build one half and mirror it, or you count from the center line outward.
The exact run lengths depend on the rounding rule used by the tool. That is why you should copy the row table from the generator instead of calculating from memory. The same inputs always produce the same table, so a saved plan is reliable.
Layers for spheres and domes
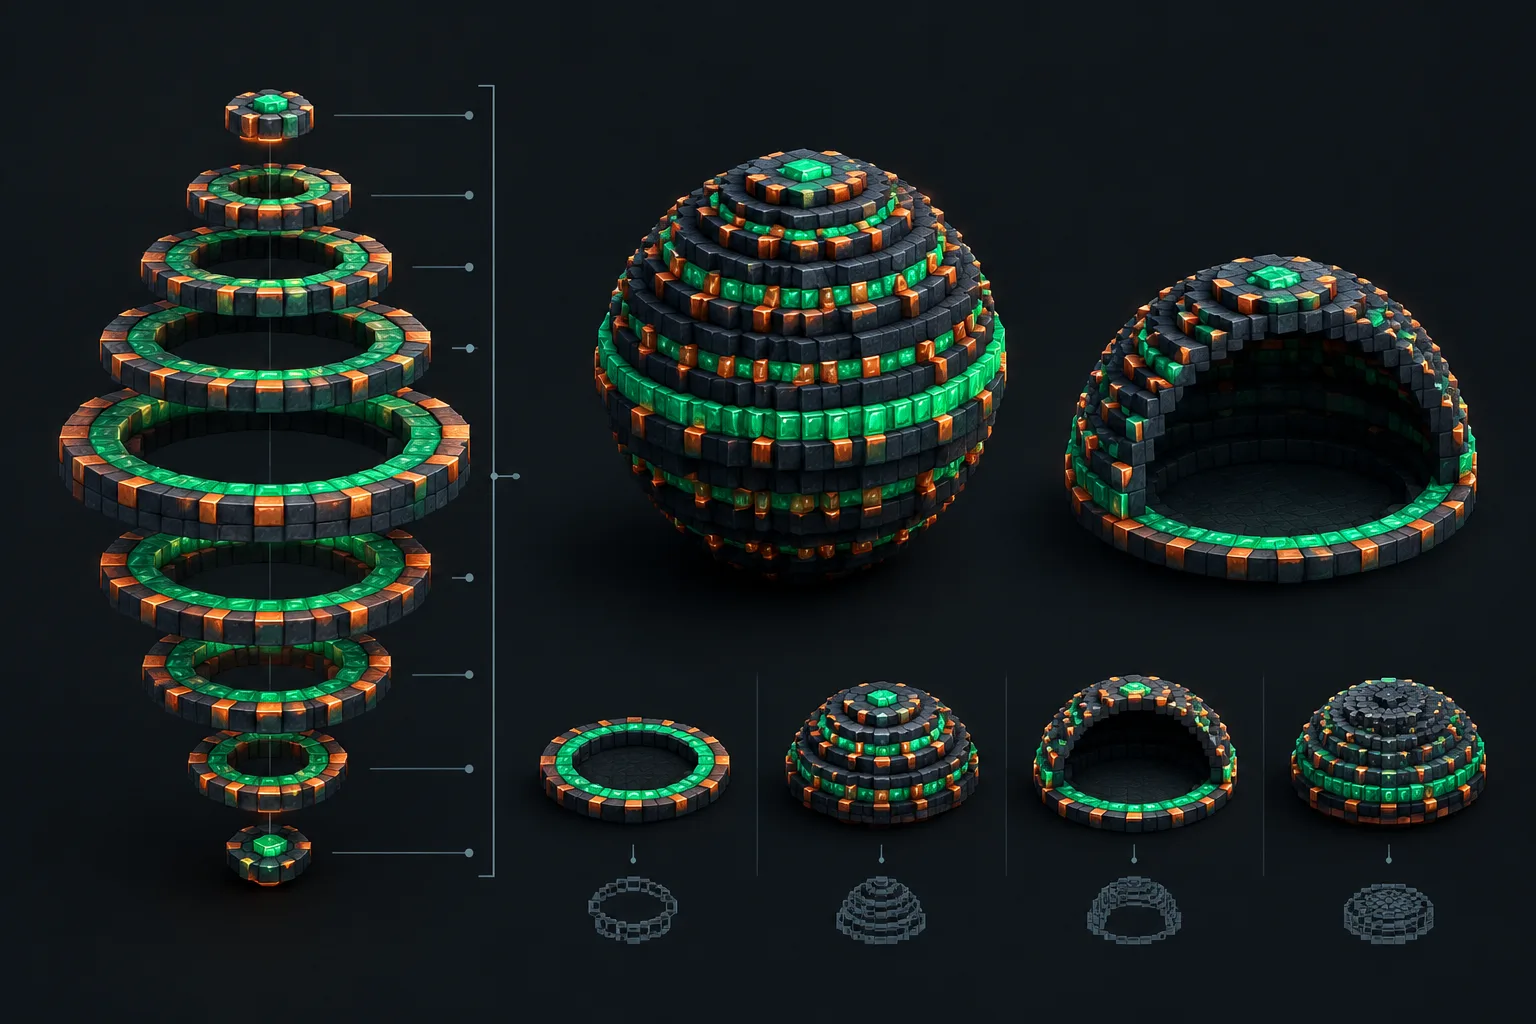
A sphere is a stack of circles. Each layer is a horizontal slice, and the slice gets smaller as you move away from the equator. The widest layer is the middle. The top and bottom layers are small caps.
A dome is a sphere cut in half. You usually start with a base ring or a filled base, then add layers that shrink as they rise. Some dome plans use a hollow shell; others use a solid stack. Decide before you count materials.
How to Measure Dimensions, Layers, Row Runs, and Materials
Dimensions
Diameter is the widest block count across the shape. Radius is half the diameter. For odd diameters, the radius is a half-block measurement from the center block to the edge. Width, depth, and height describe the bounding box. A 15-diameter circle fits inside a 15x15 square. A 15-diameter dome might have a height of 8 layers, so it fits inside a 15x15x8 box.
Layers
Layers are Y levels. Layer 1 is the lowest layer you build, not necessarily the world Y=1. Label them in your notes from bottom to top. For a sphere, the equator is the widest layer. For a dome, the base is the widest layer and each layer above is smaller.
Row runs and material counts
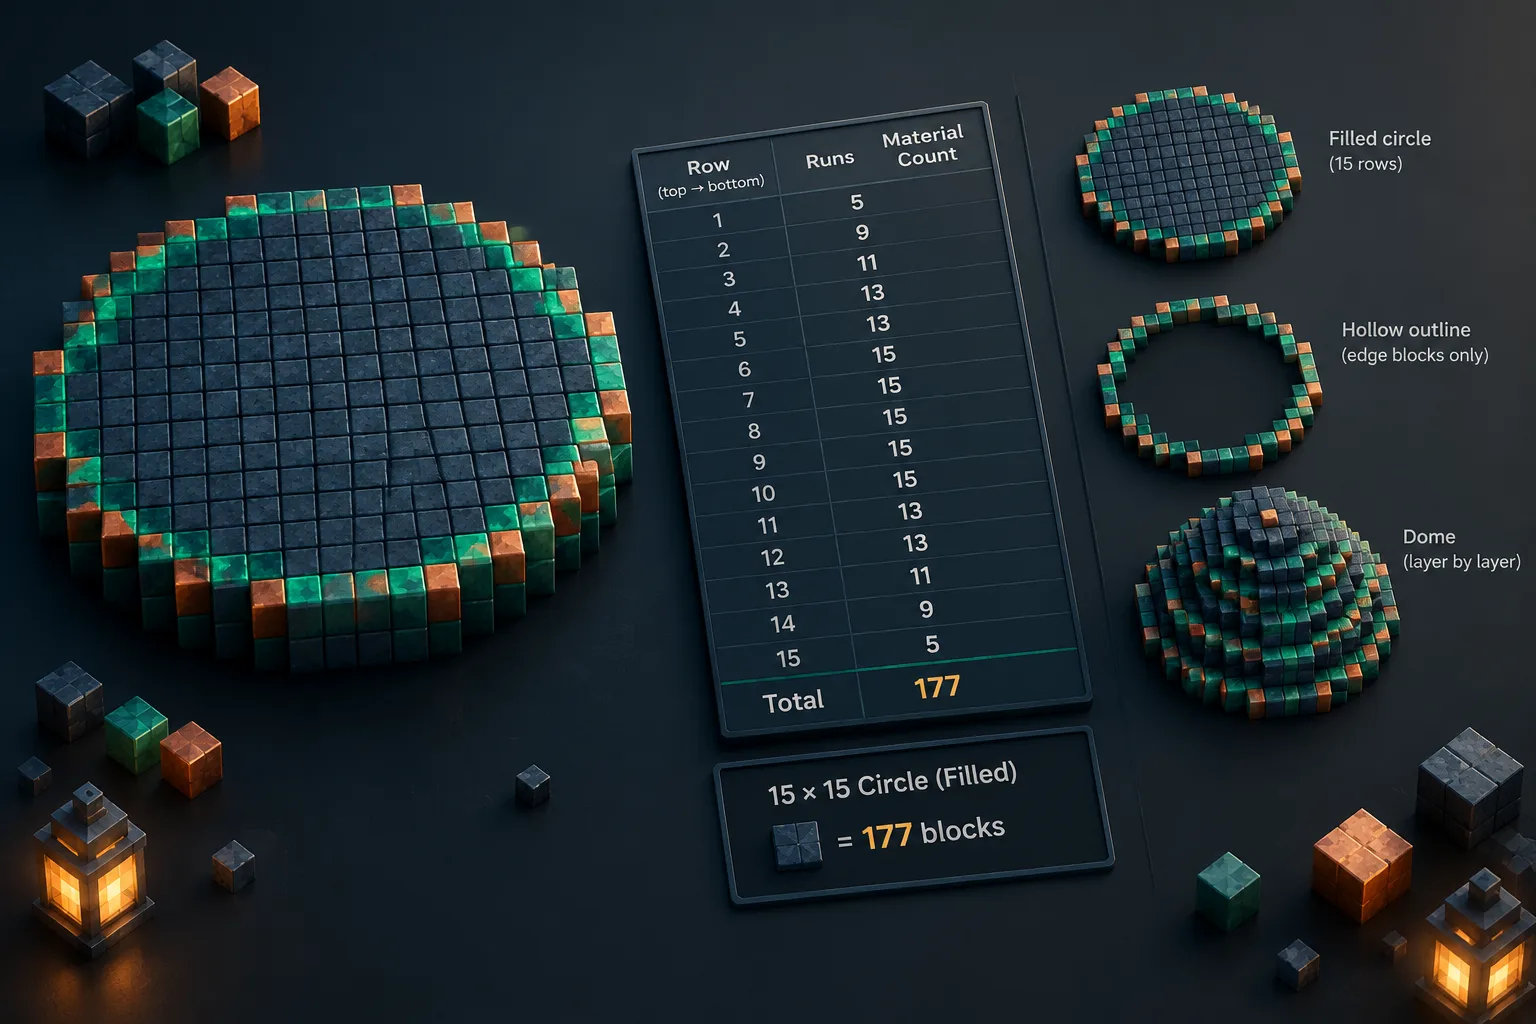
Let us work through a 15-block diameter circle. A deterministic plan can list the row runs from top to bottom like this:
5, 9, 11, 13, 13, 15, 15, 15, 15, 15, 13, 13, 11, 9, 5.
That is 15 rows. Add the runs: 5 + 9 + 11 + 13 + 13 + 15 + 15 + 15 + 15 + 15 + 13 + 13 + 11 + 9 + 5 = 177 blocks. So a filled 15-diameter circle needs 177 solid blocks before you add a foundation, railing, or decoration.
If you want a hollow outline instead, you do not need all 177 blocks. You build only the edge blocks of each row. The interior is left empty. Count the outline separately, or use a plan that marks hollow and filled rows.
For a dome, repeat the same idea layer by layer. Suppose your dome starts with the same 15-diameter base, then rises through smaller circle layers. The material count is the sum of every layer row runs. A hollow dome shell uses fewer blocks than a solid dome. The dome generator labels layers so you can add them in order.
Step-by-Step Build Workflow
Choose the shape and center. Pick a flat area or clear the build volume. Mark the center with a high-contrast block. For odd diameters, that block is the center. For even diameters, mark the center line between two blocks.
Enter your dimensions. Open the relevant tool: circle generator for circles, sphere generator for spheres, or dome generator for domes. Set diameter, width, height, and layer count. Do not change the center type after you start.
Read the row table before placing blocks. Look at the widest row and the top and bottom rows. Note the row count. If the table has 15 rows, your build area needs at least 15 blocks in that direction.
Mark the axes. Place a line of blocks or torches along the center row and center column. These guides let you mirror each row without recounting.
Build the first layer row by row. Start at the widest row, then work outward to the top and bottom. For each row, place the run length, then mirror it across the center. If a row run is 11, place 5 blocks on one side, 1 center block if the diameter is odd, and 5 blocks on the other side.
Build upward for 3D shapes. For a sphere, build the equator first, then add layers above and below. For a dome, build the base, then add each smaller layer. Check the layer number against the plan before you place a ring.
Check symmetry early. Stand above the build and compare left and right. A one-block error near the center affects every mirrored row, so fix it before you add height.
Export if you need a file. Litematic export is for compatible Java Edition mod workflows. Images, text, CSV, and Markdown plans work everywhere. If you import a Litematic file, test it in a copy world first and confirm the mod version and game version match.
If you want to place the shape in a larger build, combine it with the Minecraft house designs page or a dome roof guide. For round wall layouts, the Minecraft circle chart wiki is a useful companion.
Common Mistakes and Boundaries
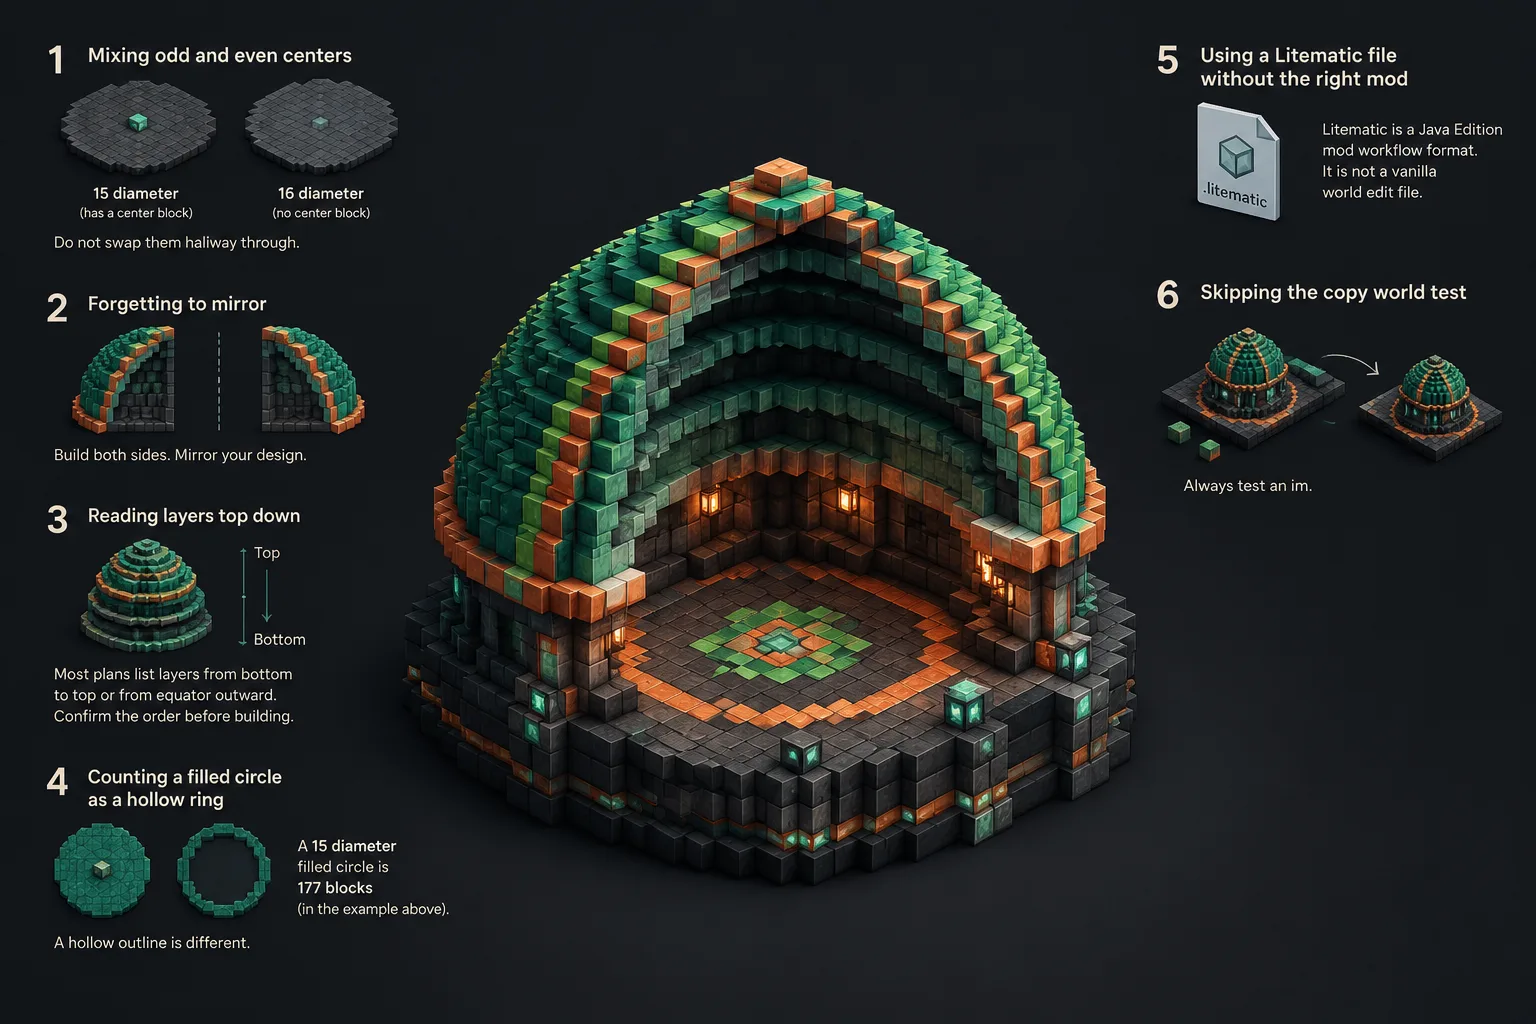
- Mixing odd and even centers. A 15-diameter plan has a center block; a 16-diameter plan does not. Do not swap them halfway through.
- Forgetting to mirror. Row runs are usually half-widths or full widths. Read the table header so you know which one you have.
- Reading layers top-down. Most plans list layers from bottom to top or from equator outward. Confirm the order before building.
- Counting a filled circle as a hollow ring. A 15-diameter filled circle is 177 blocks in the example above. A hollow outline is different.
- Using a Litematic file without the right mod. Litematic is a Java Edition mod workflow format. It is not a vanilla world edit file.
- Skipping the copy world test. Always test an import in a copy world before using it in a main survival world.
- Expecting a smooth curve from a tiny diameter. A 5-block circle is a square with corners cut. Larger diameters give more curve detail.
- Treating the site as an official product. MinecraftCircle is an independent fan-made utility and is not endorsed by Mojang or Microsoft.
FAQ
How do I make a circle in Minecraft without mods?
Use the circle generator or circle chart, pick an odd or even diameter, and build the row runs with any blocks. You do not need mods. Mark the center, mirror each row, and check symmetry from above before you build upward.
What size should I use for a Minecraft sphere?
Start with the space you have. A sphere needs a diameter and enough height for the layers. Small spheres look blocky; larger diameters show a rounder curve. The sphere generator shows the layer count and material estimate so you can compare sizes before you commit.
Can I use a Minecraft shape generator for domes and roofs?
Yes. The dome generator creates shrinking layers for domes, observatories, and round roofs. You can build a hollow shell or a solid dome. Pair it with the dome roof guide for roof trim and support ideas.
Does the generator give me a Litematic file?
Litematic export is available for compatible Java Edition mod workflows. Images, text, CSV, and Markdown plans work everywhere. Test any Litematic import in a copy world first, and confirm your mod and game version.
How do I count blocks for a Minecraft circle?
Add the row runs. For a 15-diameter filled circle with runs 5, 9, 11, 13, 13, 15, 15, 15, 15, 15, 13, 13, 11, 9, 5, the total is 177 blocks. For a hollow outline, count only the edge blocks. For a dome or sphere, add every layer row runs.