A Minecraft circle chart is a measured block layout that shows how to build a circular shape using Minecraft blocks. It converts a mathematical circle into a block-by-block plan with row runs, center placement, and dimensions that can be rebuilt consistently. Builders use circle charts for towers, arenas, pixel art, domes, and decorative structures. The chart is useful for survival builders, creative builders, map makers, and anyone who wants a repeatable Minecraft circle template instead of guessing block positions.
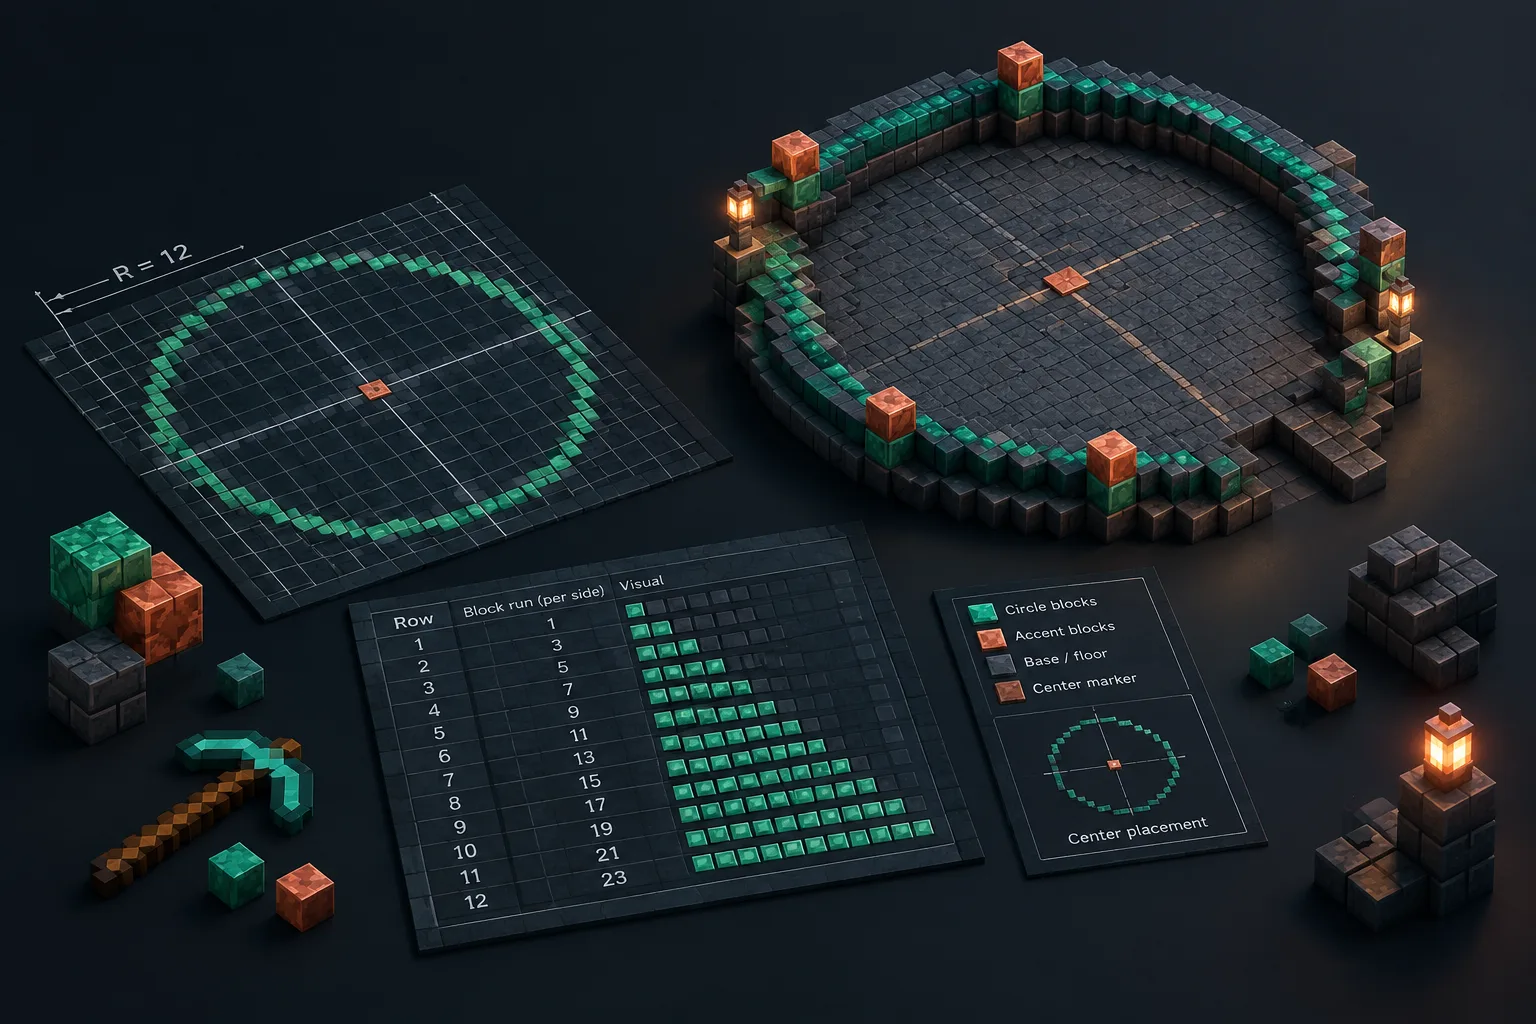
Understanding a Minecraft circle chart
Minecraft does not place blocks on a smooth curve. A circle in Minecraft is a rasterized shape made from square blocks, so every circle chart is a translation of a geometric circle into a grid pattern. The result is a set of horizontal and vertical runs that approximate the intended size while keeping the shape symmetrical.
A Minecraft circle chart normally includes:
- Diameter or radius: the overall size of the circle.
- Center point: the location used to mirror the design.
- Row runs: the number of blocks placed in each row or layer section.
- Symmetry pattern: the repeated sections that create a balanced outline.
- Template view: a visual guide that can be followed while placing blocks.
The same settings should always produce the same plan when using a deterministic generator. This makes a generated chart a reliable reference that can be saved, shared, and rebuilt later.
You can create a measured plan with the Minecraft circle generator or explore the dedicated Minecraft circle chart page for templates and size references. For related three-dimensional shapes, the Minecraft sphere generator and Minecraft dome generator extend the same idea into layered builds.
Measured method: dimensions, layers, and row runs
Choosing circle dimensions
The first decision is the circle size. A circle chart usually starts with the diameter, which is the distance from one outside edge to the opposite outside edge through the center.
For example:
- A 9-block diameter circle is useful for small details, windows, or compact towers.
- A 21-block diameter circle works well for medium platforms or rooms.
- A 51-block diameter circle can form the base of a large arena or structure.
Larger circles contain more rows and require more blocks, but they also provide smoother-looking curves because the stepped sections are spread over a greater distance.
Odd and even center placement
Circle charts need special handling for the center because Minecraft blocks occupy whole grid spaces.
An odd diameter, such as 15 blocks, has a single center block. The chart can be mirrored from that central position.
An even diameter, such as 16 blocks, has a center gap between four blocks. The design must be aligned around that gap rather than a single center block.
This difference affects how entrances, pillars, and decorations line up. A builder who ignores the center type may create a circle that is technically close but shifted by one block.
Reading row runs
A row run describes how many blocks appear in a particular line of the circle. Instead of drawing a smooth curve, the chart gives instructions such as placing a certain number of blocks across one row, moving outward, and repeating the pattern.
For example, a small section of a chart might contain rows like:
- Row 1: 5 blocks
- Row 2: 7 blocks
- Row 3: 9 blocks
- Row 4: 9 blocks
- Row 5: 7 blocks
- Row 6: 5 blocks
The exact numbers depend on the selected diameter and algorithm, but the important idea is that the row pattern is fixed and repeatable.
Worked material count example
Suppose you build a filled circular platform with a diameter of 21 blocks and your chart contains a total footprint of approximately 349 block positions.
If you create a one-block-thick floor:
- Stone blocks needed: about 349
- Border blocks: included if the chart represents the full outline
- Extra blocks: add a small reserve for mistakes or connecting paths
For a three-layer platform using the same footprint:
- Layer 1: about 349 blocks
- Layer 2: about 349 blocks
- Layer 3: about 349 blocks
- Total: about 1,047 blocks
The exact material count depends on whether you build a filled shape, outline, wall, or hollow structure. A circle chart gives the geometry; the builder decides how the shape becomes a finished structure.
Step-by-step Minecraft circle workflow
1. Choose the purpose of the circle
Decide whether the circle will become a floor, wall, tower base, decoration, or part of a larger build. The intended use determines whether you need an outline, filled area, or multiple layers.
2. Select the diameter and center type
Pick a size that matches your build space. Check whether the diameter is odd or even so you know whether to mark a center block or a center gap.
3. Generate or open a chart
Use a consistent template source such as the Minecraft circle template. Record the diameter and keep the chart available while building.
4. Mark the center in your world
Place temporary markers for the center position. For larger builds, mark the north, south, east, and west points before starting the outline.
5. Build the first quadrant
Many circle charts use symmetry. Build one quarter of the circle carefully, then mirror the same row runs across the remaining sections.
6. Check the outline before filling
Walk around the perimeter and compare the shape from different angles. Fixing the outline early is easier than replacing a completed filled area.
7. Add layers and details
For raised platforms, domes, or towers, repeat the measured process layer by layer. For pixel designs, combine the circle method with the Minecraft pixel art generator.
Common mistakes and boundaries
Assuming every circle is perfectly round
A Minecraft circle is a block-based approximation. It will have steps because the game world uses a grid. The goal of a chart is consistent symmetry, not a mathematically smooth curve.
Ignoring the center alignment
Odd and even diameters behave differently. Always check the center before placing the first blocks.
Mixing different templates
Different chart methods can create slightly different row patterns for the same diameter. Use one chart throughout a project to avoid uneven joins.
Forgetting that 2D and 3D shapes differ
A circle chart describes a flat shape. A sphere or dome requires multiple layers with changing dimensions. Use a dedicated sphere generator or dome generator when building curved three-dimensional structures.
Export and workflow limits
Some generators may provide formats such as images, text, CSV, Markdown, or Litematic files. Image, text, CSV, and Markdown formats are broadly usable. Litematic files are intended for compatible Java Edition mod workflows. Test any imported build files in a copy world before using them in an important save.
FAQ
How do I use a Minecraft circle chart?
Start by selecting a diameter, mark the center in your world, then follow the row runs from the chart outward. Use symmetry to copy each section around the center.
What are the most useful Minecraft circle chart sizes?
Common sizes depend on the project. Small circles work for decorations and windows, medium circles work for rooms and platforms, and large circles work for arenas, towers, and foundations.
How do I make a Minecraft circle template?
A Minecraft circle template can be created by choosing a diameter and converting the circle into block rows. A generator can calculate the repeated pattern so you do not have to place each coordinate manually.
Why does my Minecraft circle look uneven?
Uneven circles usually come from a misplaced center, incorrect row copying, or combining different templates. Check the center alignment and rebuild from one consistent chart.
Can a Minecraft circle chart be used for domes or spheres?
A circle chart helps with individual layers, but full curved structures need changing layer sizes. Use a sphere or dome planning tool when the shape extends upward.
For more measured building references, explore MinecraftCircle guides on Minecraft house designs and related Minecraft building guides.